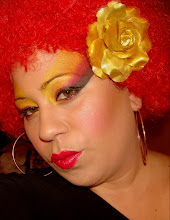
An Amazing Picture of The Art of Highlighting and Contouring!!!

It is so incredible of the tricks you can do all by yourself using Makeup...
Below I will describe in detail the steps and show you a picture demonstrating where your Makeup is placed to achieve the look you desire.
FOR HIGHLIGHTING:
Make areas come forward
-the brow bone,-center of the eyelid,-inner eye by tear duck,-center of the forehead and down through the bridge of the nose,-the cheekbone plane and under the eye ,-around the corners of the mouth,-the collarbone,-center of chin...
(see illustration if you don't understand)
Make areas come forward
-the brow bone,-center of the eyelid,-inner eye by tear duck,-center of the forehead and down through the bridge of the nose,-the cheekbone plane and under the eye ,-around the corners of the mouth,-the collarbone,-center of chin...
(see illustration if you don't understand)

FOR SHADING & CONTOURING:
Make areas recede
-the hollows of the cheek,-under the chin and down the neck,-sides and under the tip of the nose,-into the crease of the eye,-the temples,-the center of your,
-cleavage,-the hollows above and below your collarbone,-around the hairline
(see illustration if you don't understand)
PS: *For shading into your cheekbones, it's best to used an angled contour brush.
Isn't she Beautiful!!!!


No comments:
Post a Comment